Archive | April, 2014

Falafel Burgers & Rosemary Garlic Pitas

22 Apr

falafel burgers

I’m always on the hunt for delicious veggie burger recipes. They’re always super easy and full of whole foods, plus they taste soo good.

So last night I decided to make some tasty falafel inspired burgers and I went all out and made some rosemary garlic pita breads to stuff them into. They went so quickly I didn’t have time to photograph the finished product 🙂 Always a good sign.

Falafel -1

My favourite thing about this recipe has to be the fresh parsley and mint – I’m a fan of fresh herbs and I really think they make all the difference. You could totally substitute though if need be.

Falafel -11

You could also sub out the rice – I wonder what these would be like with cous cous or quinoa?

Falafel -14

The recipes are included below.. don’t be put off by the many steps it takes to make pita bread, it’s so much easier then you would think! To add to the basic pita recipe below (borrowed from the fabulous kitchn blog), I just threw in some minced garlic and rosemary while kneading. Worked like a charm!

Falafel Burgers

Ingredients

1 tin Chickpeas/Garbanzo beans

1 Garlic clove

1/2 cup Parsley

1/4 cup Mint

1 Egg white

1 cup Cooked rice

Salt & Pepper

Spices such as: Cayenne or Cumin

Olive oil


Instructions

1. Add all your ingredients to a food processor or blender (you could even just mash it up with a fork).

2. Once you’ve got a smoothish (lumps are OK) mixture, form into patties and place on wax/parchment paper and place in the fridge to firm up for about 20 minutes.

3. Gently heat some olive oil in a pan and once it’s hot, add the burgers.

4. Fry until they are golden on each side (about 5/6 minutes per side).

5. Serve either in a bun, pita or on their own!


Pita Bread

Ingredients

1 cup warm water (not hot or boiling)
2 teaspoons active dry or instant yeast
2 1/2 – 3 cups all-purpose flour
2 teaspoons salt
1-2 teaspoons olive oil (optional)

Instructions

1. Form the Pita Dough: Mix the water and yeast together, and let sit for about five minutes until the yeast is dissolved. Add 2 1/2 cups of the flour (saving the last half cup for kneading), salt, and olive oil (if using). Stir until a shaggy dough is formed.

2. Knead the Dough: Sprinkle a little of the extra flour onto your clean work surface and turn out the dough. Knead the dough for about 5-7 minutes, until the dough is smooth and elastic. Add more flour as needed to keep the dough from sticking to your hands or the work surface, but try to be sparing. It’s better to use too little flour than too much. If you get tired, stop and let the dough rest for a few minutes before finishing kneading.

3. Let the Dough Rise: Clean the bowl you used to mix the dough and film it with a little olive oil. Set the dough in the bowl and turn it until it’s coated with oil. Cover with a clean dishcloth or plastic wrap and let the dough rise until it’s doubled in bulk, 1-2 hours.

At this point, you can refrigerate the pita dough until it is needed. You can also bake one or two pitas at a time, saving the rest of the dough in the fridge. The dough will keep refrigerated for about a week.

4. Divide the Pitas: Gently deflate the dough and turn it out onto a lightly floured work surface. Divide the dough into 8 equal pieces and gently flatten each piece into a thick disk. Sprinkle the pieces with a little more flour and then cover them with a kitchen towel or plastic wrap wrap until you’re ready to bake them.

5. Shape the Pitas: Using a floured rolling pin, roll one of the pieces into a circle 8-9 inches wide and about a quarter inch thick. Lift and turn the dough frequently as your oll to make sure the dough isn’t sticking to your counter. Sprinkle with a little extra flour if its starting to stick. If the dough starts to spring back, set it aside to rest for a few minutes, then continue rolling. Repeat with the other pieces of dough. (Once you get into a rhythm, you can be cooking one pita while rolling the next one out.)

6. To Bake Pitas in the Oven: While shaping the pitas, heat the oven to 450°. If you have a baking stone, put it in the oven to heat. If you don’t have a baking stone, place a large baking sheet on the middle rack to heat.

Place the rolled-out pitas directly on the baking stone or baking sheets (as many as will fit), and bake for about 3 minutes. I’ve found it easiest to carry the pita flat on the palm of my hand and then flip it over onto the baking stone. The pita will start to puff up after a minute or two and is done when it has fully ballooned. Cover baked pitas with a clean dishtowel while cooking any remaining pitas.

7. To Bake Pitas on the Stovetop: Warm a cast iron skillet over medium-high heat until a few bead of water sizzle immediately on contact. Drizzle a little oil in the pan and wipe off the excess.

Lay a rolled-out pita on the skillet and bake for 30 seconds, until you see bubbles starting to form. Flip and cook for 1-2 minutes on the other side, until large toasted spots appear on the underside. Flip again and cook another 1-2 minutes to toast the other side. The pita should start to puff up during this time; if it doesn’t or if only small pockets form, try pressing the surface of the pita gently with a clean towel. Keep cooked pitas covered with a clean dishtowel while cooking any remaining pitas.

8. Storing the Pitas: Pitas are best when eaten immediately after cooking. Leftover pitas will keep in an airtight bag for several days and can be eaten as they are or warmed in a toaster oven. Baked pitas can also be frozen with wax paper between the layers for up to three months.


Lost Keys and Stir Fried Veggies

10 Apr

springhassprung

Since it seems like spring has finally arrived, I was super excited to take this little guy to the park.

2014-02-07 08.25.18

After a good run around, we headed home… only for me to realize half way there that my keys weren’t in my pocket. Momentary panic ensued, to be followed by a thorough search of the park.

When they didn’t turn up despite me and my furry companions best efforts, I headed back to my house.

Luckily, I’d left the door on my roof patio open earlier that morning.

So I was forced to awkwardly knock on my neighbours door (we’d never spoken) and ask him in a non-burglary way if I could jump from his roof to mine.

Needless to say, I felt pretty ninja.

And in keeping with my ninja-esque skills, combined with the beautiful realization that spring has finally sprung, I decided to create a colourful veggie stir-fry for dinner.

stirfrysauce

Keep in mind that you can really play with this recipe, totally depending on your taste and what you prefer (and what you have in your kitchen). You might have guessed that Jamie Oliver’s white wine vinegar isn’t exactly authentic, but it’s all I had 🙂

stir fry(3 of 7)

I went with a bunch of veggies (peppers, snow peas, mixed greens, garlic, shredded carrot, baby corn) and topped it off with some baked crispy chicken, spring onions and sesame seeds.

stir fry(4 of 7)

stir fry-(5 of 7)


The great thing about stir fry’s is being able to literally throw in whatever you have on hand, so experiment and figure out what you like! Other veggies that I love to use are broccoli, cauliflower and bak choi.

stir fry(7 of 7)


Stir Fry Sauce

Ingredients

  • 2 tbsp brown sugar
  • 2 tbsp soy sauce
  • 1 tbsp fish sauce
  • 1 tbsp vinegar
  • 1 tbsp hot sauce or chilli sauce
  • 1 1/2 tsp sesame oil
  • 3/4 tsp corn starch


Directions

  • Stir all the ingredients together in a bowl and add to your vegetables as you stir fry them in a wok.


“Sorry My Dog Freaked Out Your Kid” Sugar Cookies

4 Apr

The fiancee and I are proud puppy parents to this little guy:

Super Pup!

He’s a pug/chihuahua cross and at 7 months old, he’s still the feistiest little guy I’ve ever met…. for the most part. After a run around he passes out hard:

Put that tongue away!

The other day we were down at our local park when our little fur baby jumped on our neighbours little girl (she’s just a wee one at about 2 years old). All he wanted to do was lick her face (one of his favourite past times) and be touched by her (he’s a lover, not a biter), but of course she’s a small kid and panicked at this gargantuan beast barrelling his way towards her. She immediately started bawling and her dad had to pick her up and try to get her to stop protesting that she wanted to leave NOW! Needless to say we felt bad.

Really bad.

Her parents insisted that it was ok, that she’s just a little scared of dogs.

That made me feel worse.. Has our badly behaved puppy implanted a life long fear of dogs in this little girl?

So what do I do when I feel like I’ve wronged someone?

Bake! (Not sure what that says about me and how I cope with stuff… but that’s material for another day)

And what better for a little kid than some fun sugar cookies. Plus they’re a breeze to make and are easily dressed up with icing to make ’em all sparkly and magical. Oh and I have a dog shaped cookie cutter 🙂

So I banged all the ingredients (recipe below) into my kitchen aid and let it do it’s thing. I let it chill in the fridge, then rolled that sucker out and cut out my little shapes. A quick spell in the oven and hey presto:

sugar (2 of 8)

So my doggy cookies were a bit of a hassle.. those skinny legs were tough to get out of the cutter. Makes them slightly less menacing though, right?

sugar (3 of 8)
I whipped up a simple icing, using milk instead of egg whites or meringue powder.

sugar (4 of 8)

Instead of using a fancy piping bag, I just went with the plain old zip-lock technique. A little messy, but makes it easy to add the colouring. Just squeeze a few drops in with the icing then zip it up, smush it around and there you go (this would probably be fun to do with kids if you don’t mind things getting messy).

sugar (5 of 8)

If you want to add sprinkles/sparkles, make sure you do it before the icing dries, which in my case only took about 20/30 minutes.

sugar (6 of 8)

Then it was “sit and wait around till they set”…

sugar (8 of 8)

I’ve packaged them up and I’m just finishing this post before I head out the door to deliver them ..hopefully I’ll make that kid smile today 🙂

Cross your fingers for me!

E

sugar (1 of 1)

Sugar Cookies (from allrecipes):

  • 1 1/2 cups butter, softened
  • 2 cups white sugar
  • 4 eggs
  • 1 tsp vanilla extract
  • 5 cups all purpose flour
  • 2 tsps baking powder
  • 1 tsp salt

Directions

  1. In a large bowl, cream together butter and sugar until smooth. Beat in eggs and vanilla. Stir in the flour, baking powder, and salt. Cover, and chill dough for at least one hour (or overnight).
  2. Preheat oven to 400 degrees F (200 degrees C). Roll out dough on floured surface 1/4 to 1/2 inch thick. Cut into shapes with any cookie cutter. Place cookies 1 inch apart on ungreased cookie sheets.
  3. Bake 6 to 8 minutes in preheated oven. Cool completely.


For the frosting, I just blended roughly 3 tbsps of milk with 1 cup of confectioners/icing sugar. You can vary the amount of milk depending on the consistency you’re going for.


Yam & Quinoa Croquettes

2 Apr

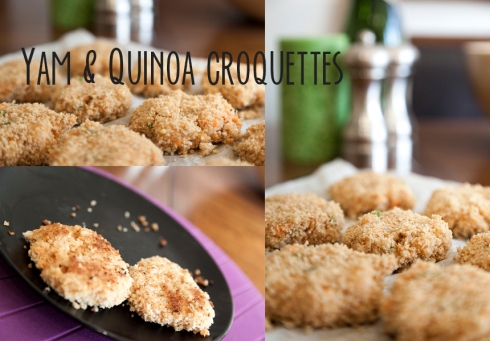
yam-quinoa-croquettes

So, full disclaimer… these are delicious and super more-ish. Luckily, following the recipe (with some minor adjustments) that I found over at the wonderful eats well with others blog, you’ll end up with enough of these bad boys to feed an army.

Which is great news, if like me,  you’re cooking for a man with a seemingly endless appetite 🙂

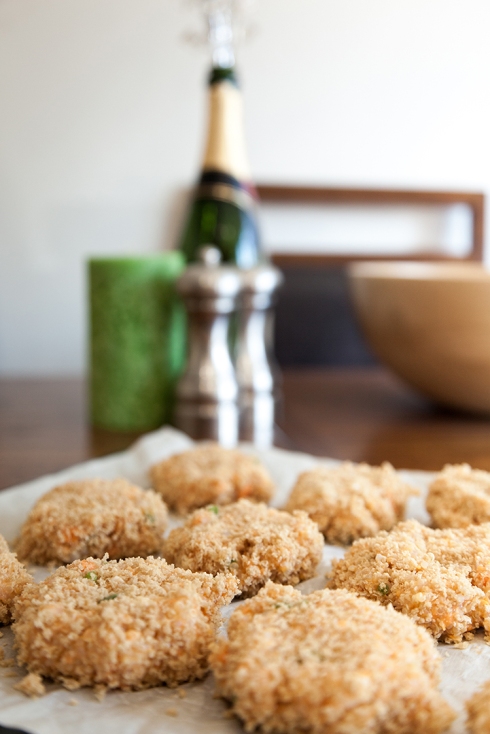
croquettes

Seriously though, I think I ended up making a total of about 20 croquettes. So I suggest you do what I did and freeze those leftover suckers for a lazy day meal.

My main adjustment was using a yam instead of a sweet potato, mainly due to what I had available, but I gotta say.. I do love the vibrant orange colour of a yam vs sweet potato.

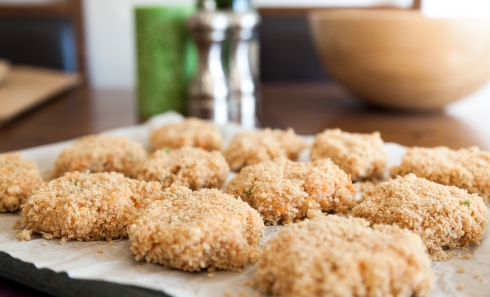
croquettes (1 of 9)

I also used a pablano pepper instead of a jalapeño, resulting in a slightly less spicy, but still super flavourful croquette.

Mine ended up being really gooey once I’d mixed everything up, but once I’d chilled them in the fridge they retained their shape pretty well, with only minor casualties in the frying pan.

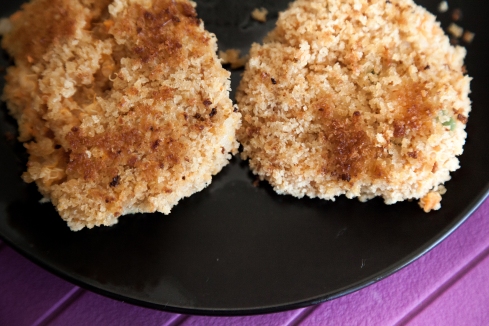
croquettes (9 of 9)

I served mine with a caesar salad, which paired really well. I found it nice to have something creamy to offset the earthy-ness of the croquettes. Extremely delicious and  nutritious, these  will definitely end up on my menu again 🙂

(recipe slightly adapted from eats well with others)

Ingredients

  • 12 oz yam
  • 2 cups water
  • 1 cup uncooked quinoa, rinsed
  • 1/4 tsp salt
  • 2 tsp olive oil
  • 1 small onion, chopped
  • 1 pablano pepper, seeded and finely chopped
  • 1 tsp ground cumin
  • 1/2 tsp dried oregano
  • 1/2 tsp freshly ground black pepper
  • 2 garlic cloves, minced
  • 1/2 cup low fat cottage cheese, drained
  • 1/2 cup finely shredded extra-sharp cheddar cheese
  • 1 large egg, lightly beaten
  • 1 cup panko
  • cooking spray

Instructions

  1. Pierce the yam with a fork and place on a paper towel in the microwave.  Microwave on high for 5 minutes or until the fork pierces the yam flesh easily, turning it after 3 minutes.  Wrap in a towel and let stand for 5 minutes. Peel and mash.
  2. Bring 2 cups water to a boil in a saucepan.  Add the quinoa and salt.  Reduce the heat and simmer, covered, for 15 minutes. Drain.
  3. Heat a large skillet over medium high heat.  Add 2 tsp oil to pan and swirl to coat.  Add the onions, cilantro and pablano to the pan. Saute for 1 minute.  Add the cumin oregano, black pepper and garlic. Saute for 1 minute. Combine the yam, quinoa, onion mixture, cottage cheese and cheddar cheese in a bowl, mixing well.  Let stand 5 minutes. Stir in the egg.
  4. Shape the yam mixture into 15 patties.  Carefully dredge them in the panko. Place on a baking sheet. Cover and chill for 10 minutes.
  5. Heat a skillet over medium heat. Coat the pan with cooking spray. Add 5 patties to the pan. Cook 2 minutes on each side or until golden brown.  Keep warm. Repeat with remaining patties.